Convert py to exe | pyinstaller and auto-py-to-exe tutorial
Hey guyz, today I am going to talk about how you can convert your python scripts into distributable executables (exe files) that you can share with your friends and family, so that they can run your programs without going through the procedure of downloading and installing Python interpreter locally.
So without any further ado, let’s begin.
Is it possible to convert python scripts to exe files ?
Of course it is !!! what do you think this post is…a clickbait !!!
Anyway…..yes ! it is possible to convert your python script to executable file. You can use one of the two options below to do so. Personally I feel that the second option is a lot more better as it provides a nice GUI interface to perform the task. The options are:-
1. Pyinstaller
2. auto-py-to-exe
1. Pyinstaller
A bit of intro at first.
Pyinstaller is a python module that provides a command-line interface to convert python files to executable files. Here is an example of its working.
Here I have a test python script (which, ironically, is also named as ‘test.py’). This is the image before I create exe file. And this is the image after creating exe file
Let’s analyze the created files and folders.
1. build
This folder contains associated log and other additional files required and created by pyinstaller. It also contains the exe format of your script. However, beware !!! this is not the file we are after.
2. dist
This is the folder that we want. It contains the distributable version of our python script. This is the folder that you would want to share to your friends and family, containing the executable file.
3. test.spec
This is a specifications file containing the configuration information with which the python script was converted to executable. You don’t really need to do anything about it. You can just leave it for now.
And as of __pycache__ folder, it simply contains the C compiled version of our python script.
Pretty simple right…now let me show you the command to do this stuff
Installing Python
The command to install python is simple…..just make sure python and pip is installed in your system
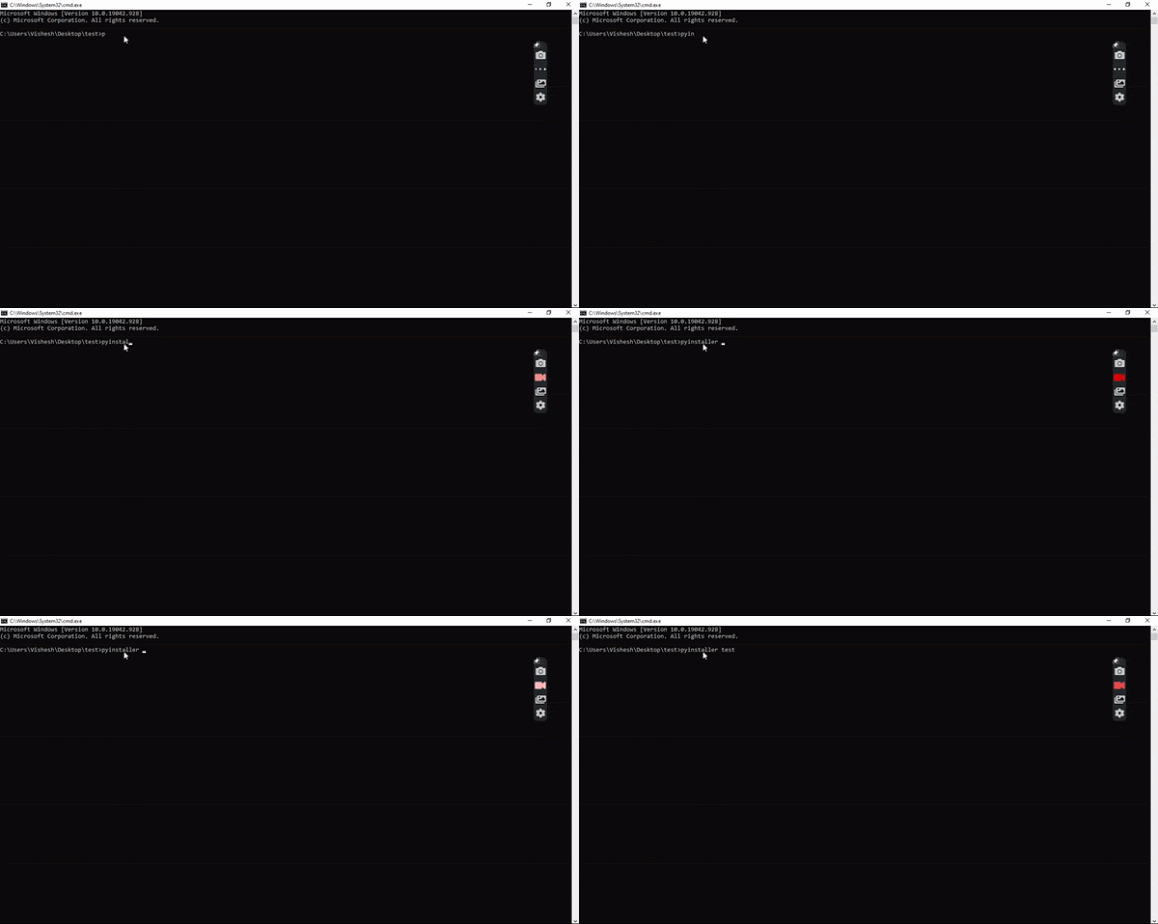
Open terminal on your system and type the following command:
pip install pyinstaller
The output should look like this:-

Once the installation process is complete, you are ready to use it.
To simply convert python script to executable, just like in the above screenshots, open terminal where python script is, and then enter following command (for test.py file)
pyinstaller test.py
Here is how the output will look like

Once the command execution is completed, you will get folders and files dressed just like I showed in the screenshots above
Pyinstaller command line arguments
Now the command that I showed you was just a simple pyinstaller command with no command line arguments. But pyinstaller provides a variety of very useful command line arguments that you should definitely know of.
Here are some common pyinstaller command line arguments:-
Although there a tons of other command line arguments, but honestly I don’t think you would need any other arguments than the one mentioned above.
It’s like I have picked the best teaching , just for you. 😀😀😀
2. auto-py-to-exe
Just like pyinstaller, auto-py-to-exe is a python module that also converts python script to executable.
But then what’s the difference ???
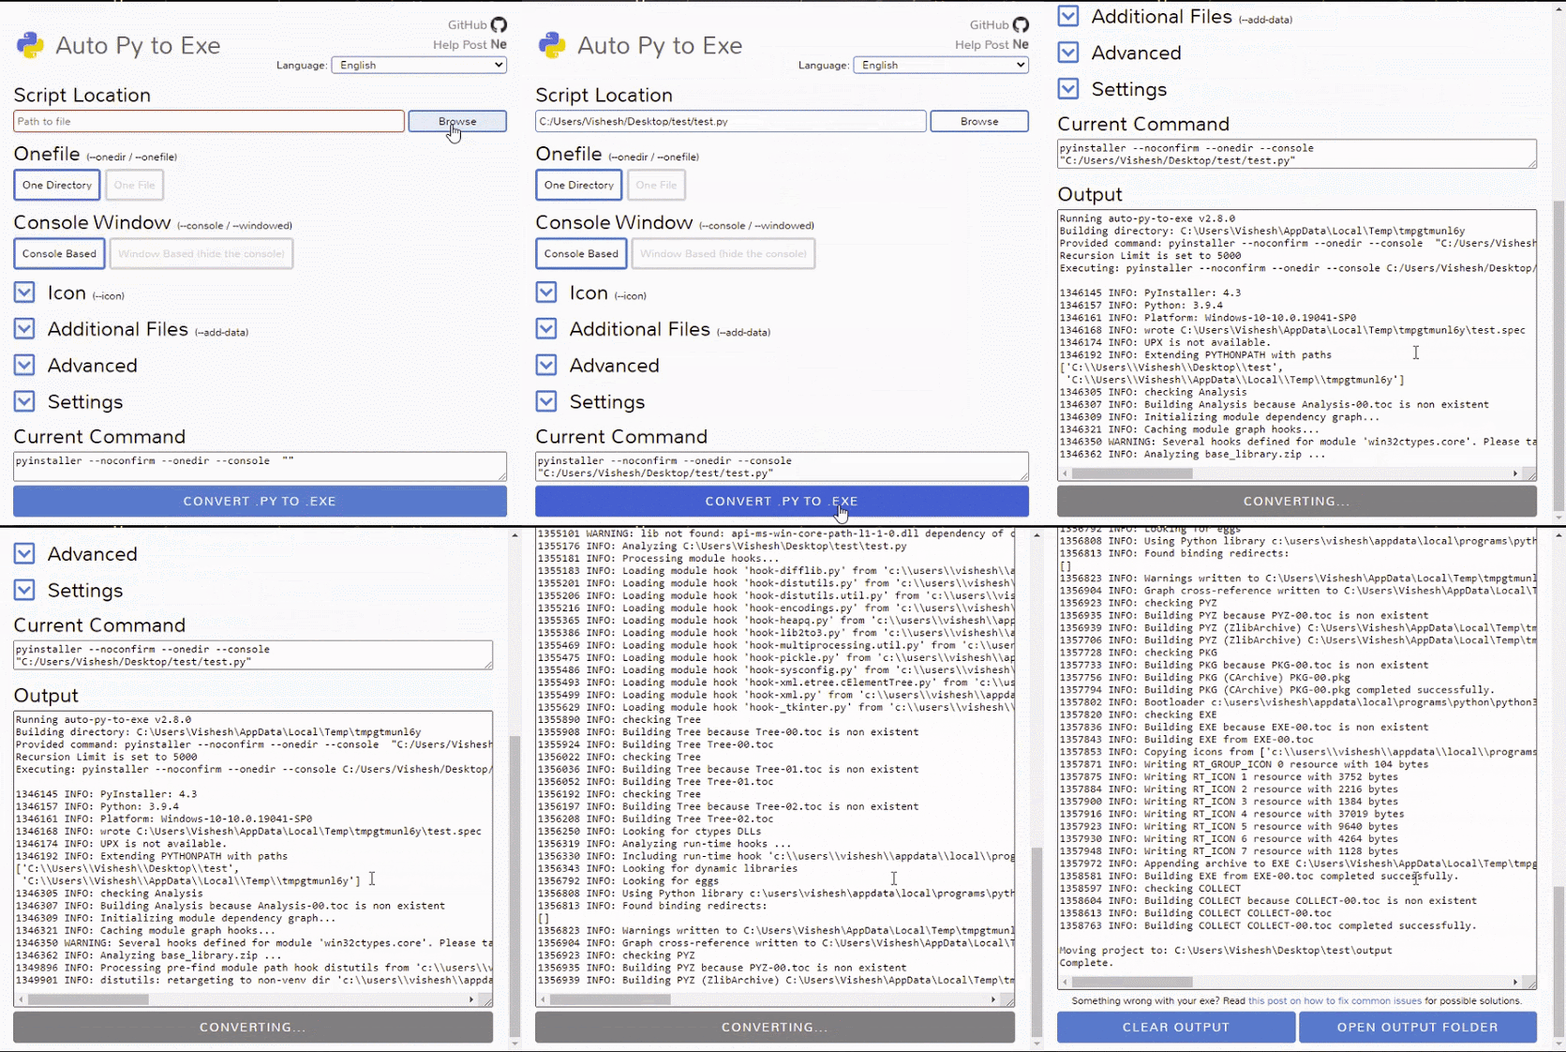
While pyinstaller looks like command prompt, auto-py-to-exe looks like this
Isn’t that better than the black and white command line ???
Trust me…it is.
Unlike pyinstaller, using this is pretty easy. You know….child’s play.
Step 1: Enter python script file location
Step 2: Either select ‘OneFile’ (if you want your output to be single executable file) or select ‘OneDirectory’ (if you want your output to be a folder with all required files) (recommended)
Step 3: Either select ‘Console Based’ (if you made a console based application) or select ‘Windows Based’ (if you made a GUI application)
Step 4: As additional options, you can mention executable icon (in ‘Icons’), additional files required with the executable file (in ‘Additional Files’) or any other options (in ‘Advance’)
Step 5: Finally hit the BIG, FAT BLUE button down below and let the program do the rest
After that you can have a sip of coffee, as you see the program do all the heavy lifting
The working looks like this

Well that’s pretty much it guyz. Thank you for reading till the end.
If you have any issues at any stage of the process, don’t forget to comment down below your issues
Also check out my other posts where I cover various other topics related to Python.
Quora: https://www.quora.com/profile/All-About-Python-2
Youtube: https://www.youtube.com/channel/UCggZvARaczWC4wc4E6f330w
My Blog Site: https://allaboutpython.vercel.app/
